Zero to virtual production hero in 14 steps
19 Jul 22
Virtual production has arrived with a bang. Big name producers - most famously for The Mandalorian - are filming with huge state-of-the-art LED walls as virtual backdrops, instead of going out on location. But you don't have to be Disney to create something magnificent in a virtual studio.
Here are 14 things we learned about virtual production on a budget...
As a full service creative agency stuffed full of obsessive digital enthusiasts – Tilt has always sought to push the boundaries of what’s possible. We were early to take to the skies with octocopters, before small consumer drones with cameras became a thing, and we were live-streaming 360 video, right at the very start of it. Naturally we had a keen eye on virtual production (VP) as it began to emerge in the big studios, and helped keep the box sets coming throughout lockdown. We knew that soon the time would come to get involved — getting a head start on a potential tidal wave of forward-thinking indie filmmakers who are thinking the same thing.
So we pitched an idea to one of the Big Four professional services firms, using virtual production to bring to life their initiative around ESG — Environmental, Social and Governance. ESG is about building social responsibility into the core of how business and governments function, bringing about a brighter future for everyone. And as a business that likes to be known as tech pioneers, and with VP’s potential to produce far less carbon than location filming, our clients jumped at the opportunity.
Now the film is live, we’re ready to share 14 tips for virtual production shoots on a budget. But first, what exactly is virtual production?
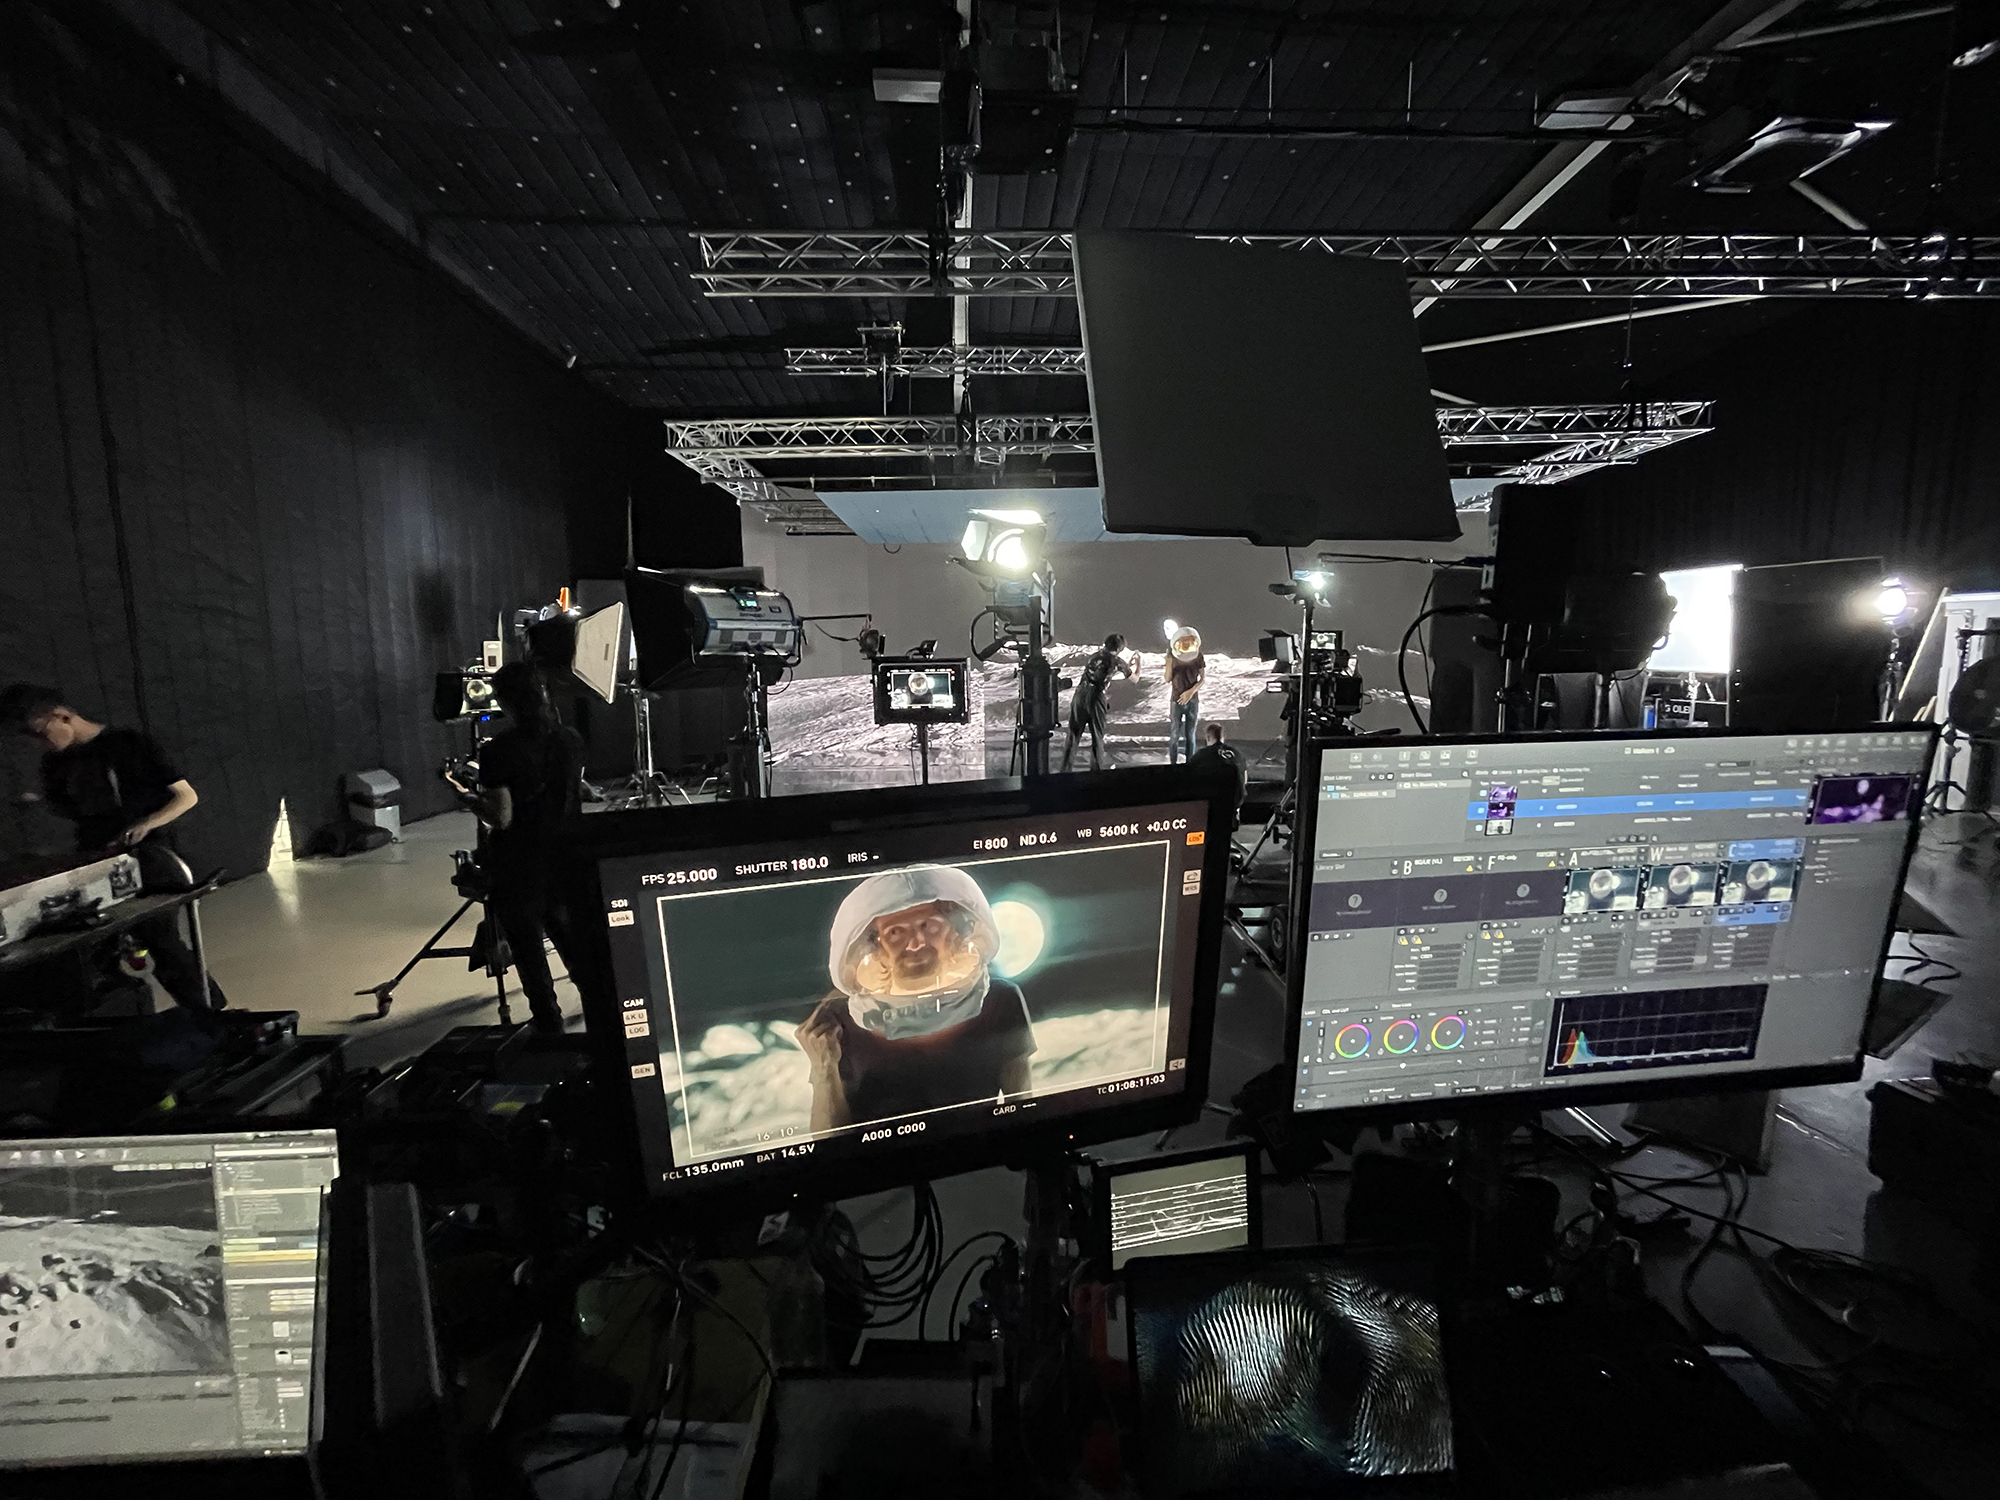
What is virtual production?
For those who don’t know, think of it like virtual reality without the goggles. You have a film set that is partly enclosed with huge LED walls and ceiling, on which is displayed any kind of rich real-time 3d environment that you could dream up. The set blends seamlessly with the backdrop to give a very accurate illusion of reality. In VR, things react to the movement of your body; in virtual production, the LED walls react to the movement of the camera — the digital world that the lens sees, shifting and parallaxing accordingly for a fully immersive perception of depth and space.
Beyond being a substitute for location filming, VP stages take out much of the headaches associated with green screen shoots. The talent doesn’t have to interact with unseen characters or scenery, the ambient lighting and reflections are correct in-camera, and the production process is more intuitive — allowing creative decisions to be made on the fly as you might do with filming in a real world location.
1. Make sure virtual production fits the brief
For our film about ESG, the idea was to create a walk and talk monologue, with continually changing backdrops — using the technology to place our talent within a variety of relevant and stunning environments. It was an opportunity to let the imagination run wild — endless possibilities, like placing them on top of a towering wind turbine or even walking on the moon.

2. Plan your CGI out at the pre-production stage
One thing to take into account with VP, is that CGI development needs to happen up-front, rather than in post. This front-weights everything, and adds to the pressure leading up to the shoot day. Getting fully accomplished 3d animation ready before the camera starts rolling is quite unnerving, so we gave ourselves plenty of pre-production lead time to get ahead of the game.
We chose to film at Garden Studios in West London, where amiable virtual production supervisor, Mark Pilborough-Skinner, gave us a comprehensive demo. Mark was an invaluable help throughout the process and was instrumental in guiding our choices for the 3d build, to ensure there would be no hiccups.
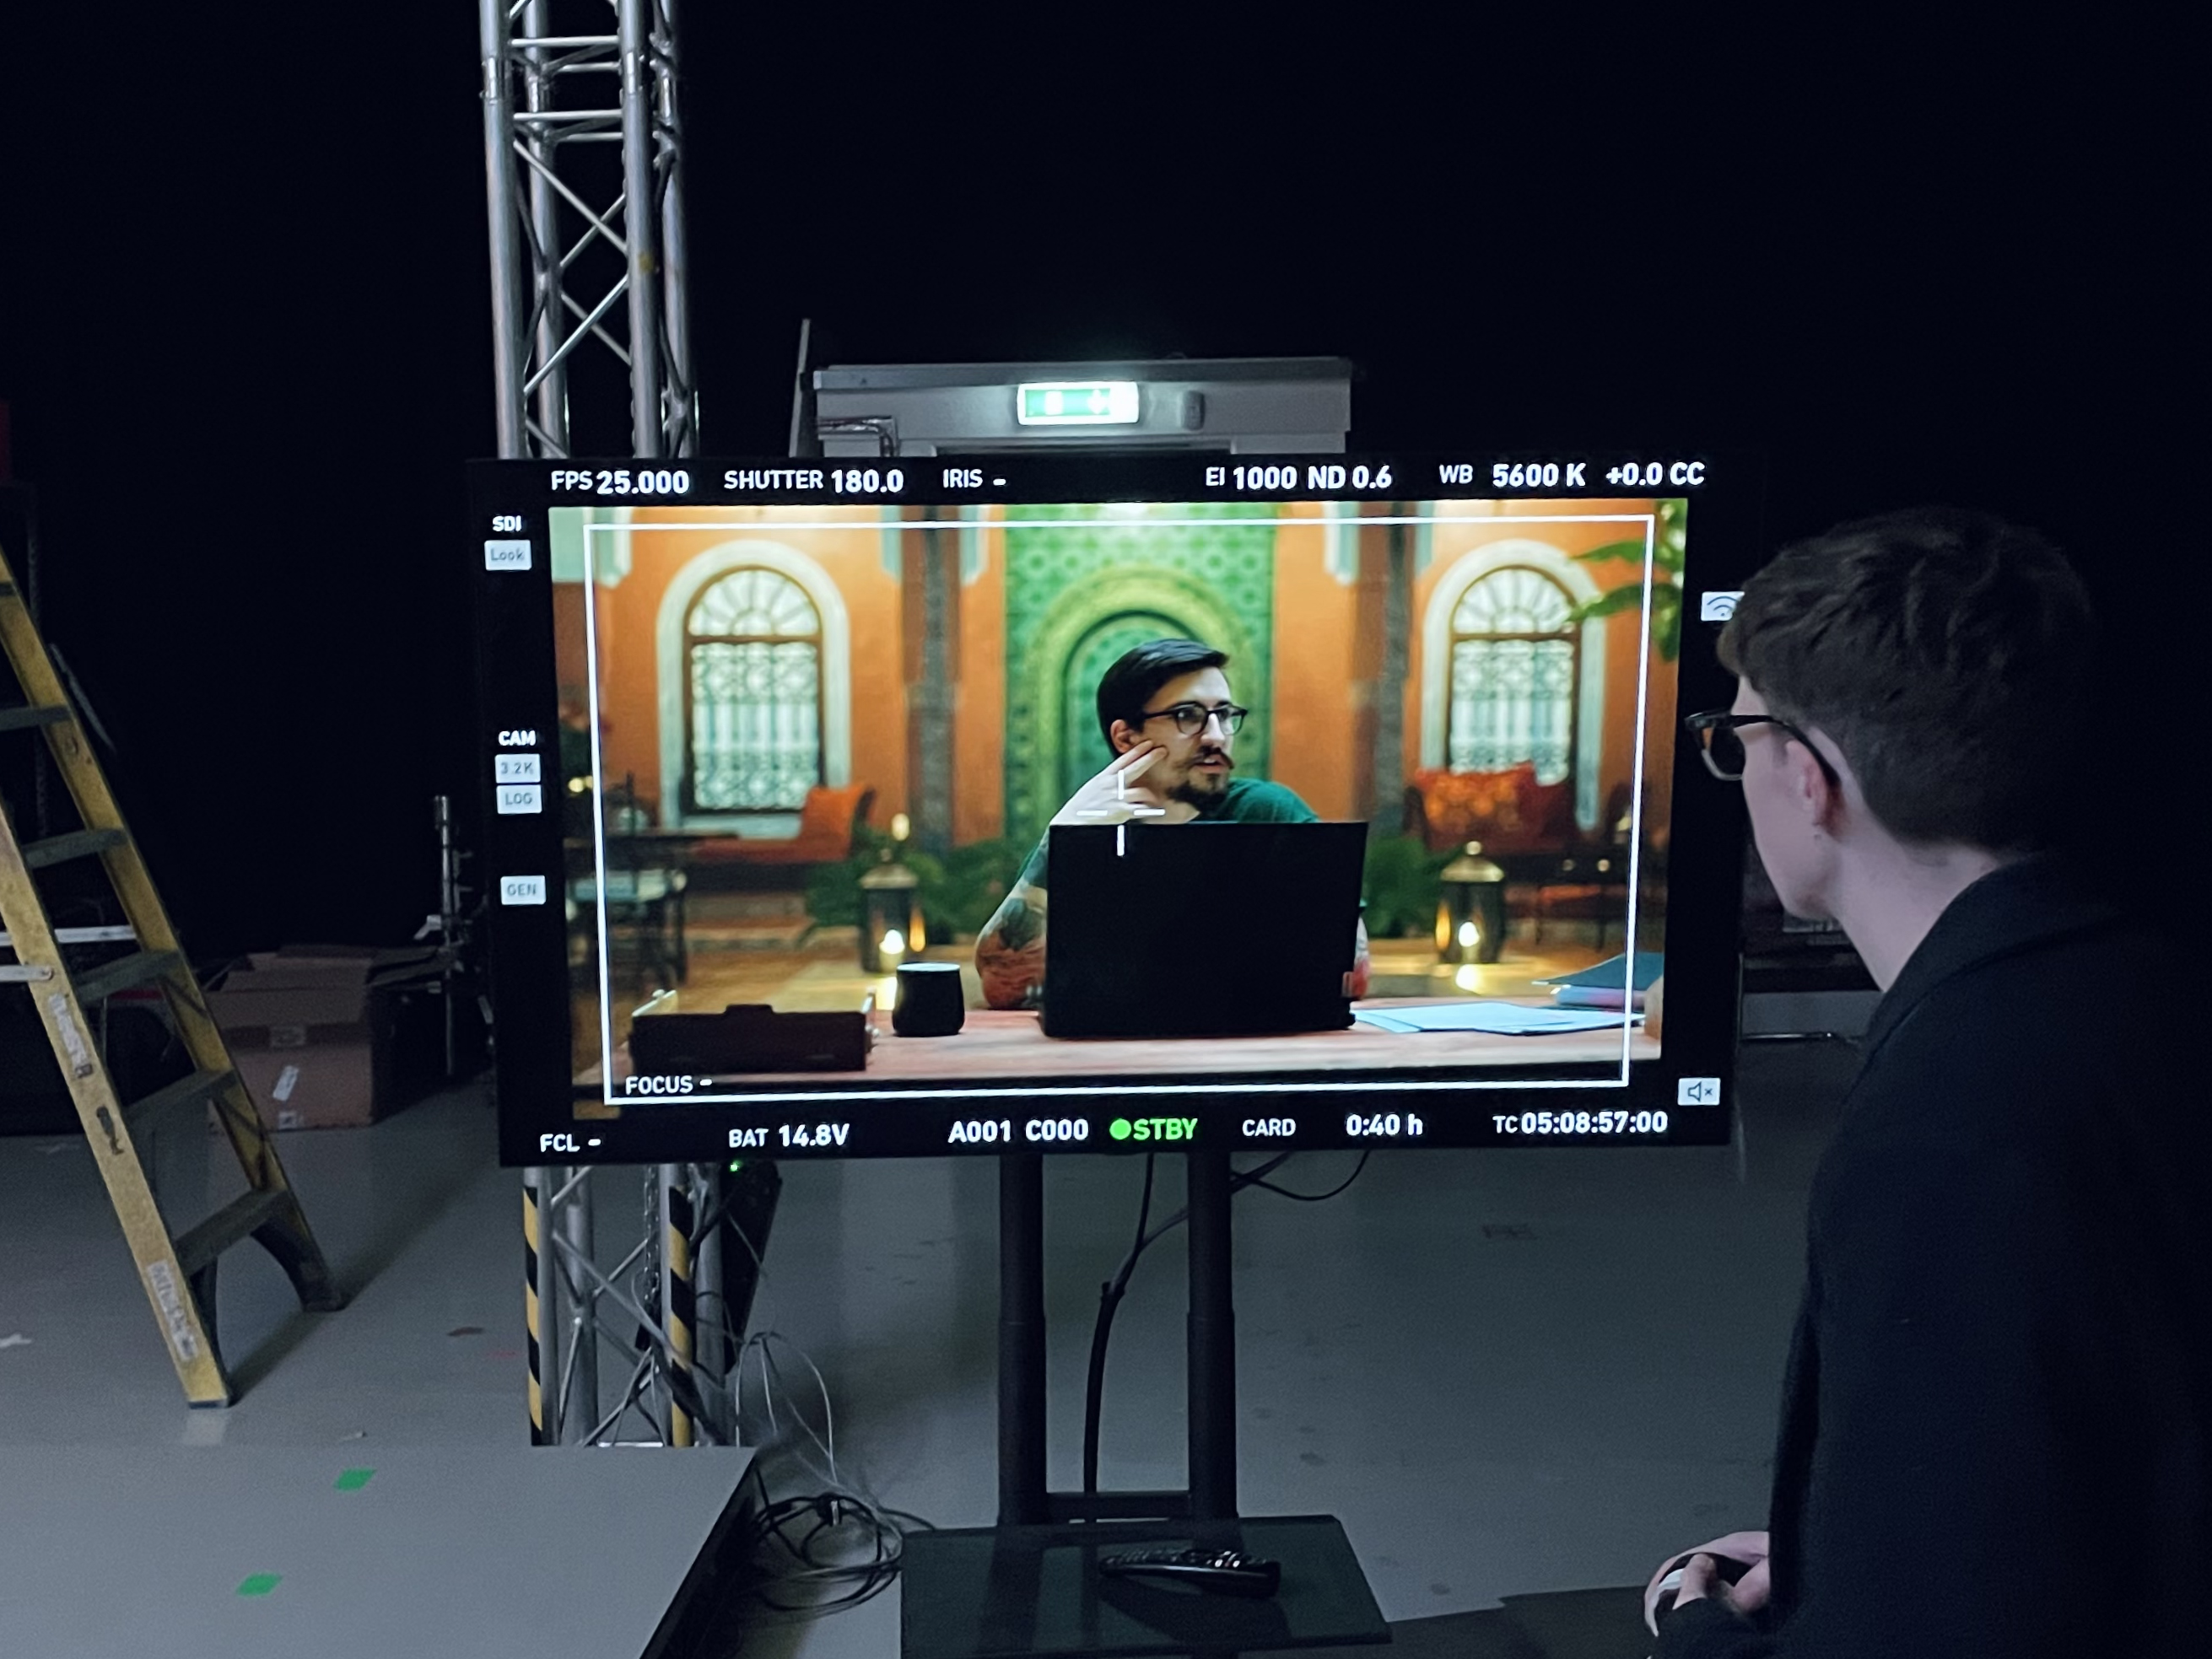
3. Snoop around Unreal Engine
At Garden, they use Unreal Engine to make the magic happen. Unreal, predominantly used for video game development, is also a market leader in VP due to its ability to render incredible cinematic 3d on the hoof. When you think about the massive render times still associated with 3d animation, Unreal is really doing something quite supernatural, with seemingly very little trade-off in terms of perceivable visual quality. Already people are creating brilliant real-time motion graphics with Unreal, and I can see it stealing business from software, such as Cinema 4d, in the future, as digital artists increasingly discover Unreal’s potential.
At the time, Unreal 5 had just dropped — jaws dropping around the world to The Matrix Awakens: An Unreal Experience. It was early days though, and we were taking no chances. Key systems, such as foliage were still missing, so we stuck with the more than capable Unreal 4.27 that’s had plenty of time to bed in. Incredibly, there’s no cost for software or licensing, unless you’re lucky enough to cross the million dollar project revenue threshold — at which point you pay Epic a percentage.
4. Unreal Marketplace is a time-saver
Only one of our 3d environments was built from scratch. Everything else was initially sourced from Unreal Marketplace through the Epic Games launcher, where you can buy ready-made works of art that are perfect for the VP stage. There’s a real variation in quality, from massive masterfully-created worlds, populated with detailed fully rigged objects, with comprehensive LOD (level of detail), right down to 3d that really doesn’t pass muster. It’s easy to spot the good stuff, and generally speaking, the more you pay, the better it is … but not always. The beautifully constructed City Park — complete with realistic foliage, water particle systems and location sound — was completely free, while our biggest spend was a super realistic recreation of downtown San Francisco, Real City SF Mega Pack, populated with 3d people costing $1500. Being honest, the CGI human beings were quite shonky up close — to be expected, I suppose, at such a relatively low cost — and we made the decision early on, to avoid 3d human characters unless way in the background, and out of focus.
5. Use Unreal Editor to make it your own
Digital artist and Unreal wizard, Joe Plant, crafted the environments to feel bespoke to our narrative. With Mark’s help, they were optimised for the VP stage, and animation sequences connected to key-press controllers, for live triggering of Joe’s sequences on the director’s cue.
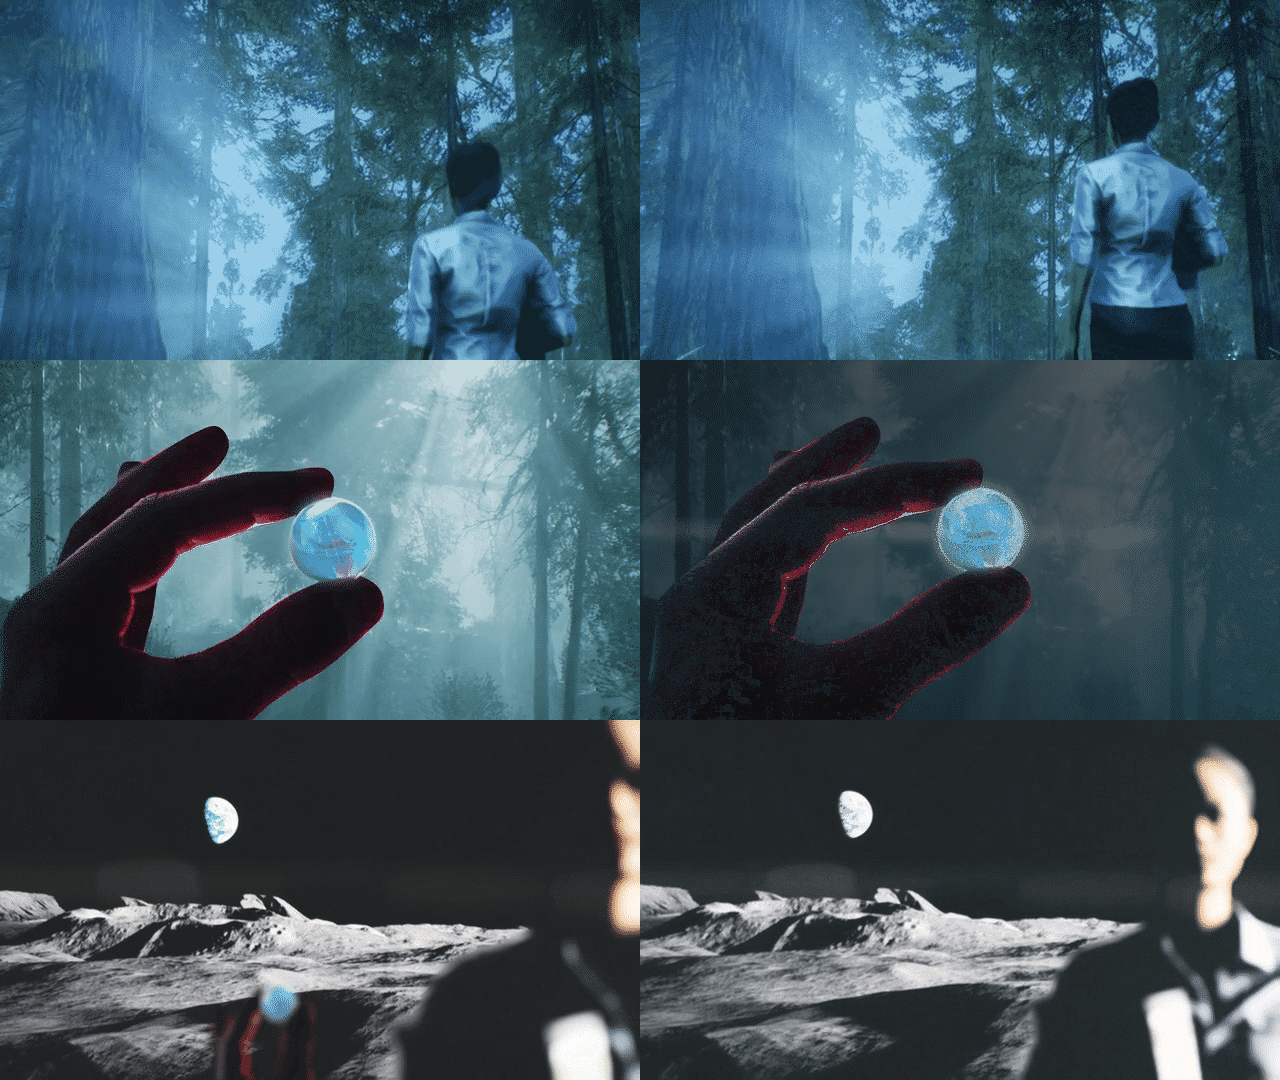
Unreal Editor, despite holding unfathomable depths of menus and features, is quite intuitive to get up and running with, for those with a little knowledge of 3d. A few YouTube tutorials in, I was able to keyframe camera movements and render them out. It meant I could experiment with Joe’s scenes, find the perfect movement for each shot, to get the very best out of our time at Garden Studios. It also gave us well-developed animatics (see below) to very accurately communicate our vision to the client — avoiding surprises down the line.

6. Finding a director of photography who understands the process
If you’re filming at a virtual production stage, make this your top priority! Garden Studios recommended former Peep Show DP, Saul Gittens from Procam Take 2, at an early stage of the pre-production plans. Both companies have a strong working relationship, and in turn, Saul is involved with many of the virtual productions at Garden. This close partnership allowed us to really hit the ground running.
From the very first conversation, it was clear Saul was a safe pair of hands. There were many critical pre-production discussions, and we took an open, collaborative approach — bringing trust on both sides, and allowing Saul’s wealth of experience to really shine through.
7. Pick the right camera (and grab a grip)
Saul captured everything on the ARRI Alexa Mini with TLS Vega full-frame primes from Procam Take 2’s London branch. The Alexa is a great choice because of its global shutter, which is essential for VP. The Vegas have a vintage cinematic look — one of the best options for keeping the undesirable moiré effect from the LED walls at bay, compared to most modern, sharper lenses.
In terms of grip, huge sweeping camera movements were a pre-requisite, to really make the most of the VP stage. One of the key scenes had our talent perched on top of a towering wind turbine, set within a soaring mountain landscape. I wanted to start close as the dialogue is delivered, dollying back and rising rapidly on a jib to make the audience feel queasy.
You don’t always have to go big, of course. We were keen for some of the shots to be handheld — with an Easy Rig to save Saul’s vertebrae from the tank-like fully built Alexa, tangled in heavy-duty wires. The organic breathing’ created by using the camera in a hand held configuration really does seem to drive the illusion of reality – perhaps because our brains associate this style of operating with run – and – gun realism.
8. Don’t forget the real lights
The VP walls provide accurate ambient lighting and reflections, which really helps to sell the illusion. At the simple drag of a finger in the Disguise app, Mark and his team can re-orientate the sun, change the time of day, and add virtual lights of any shape, brightness and colour into the scene — lighting that can provide real in-camera bloom and flare. It’s so inspiring to see all this in action, at incredible speeds of working, and you can’t help but think that this is the future.
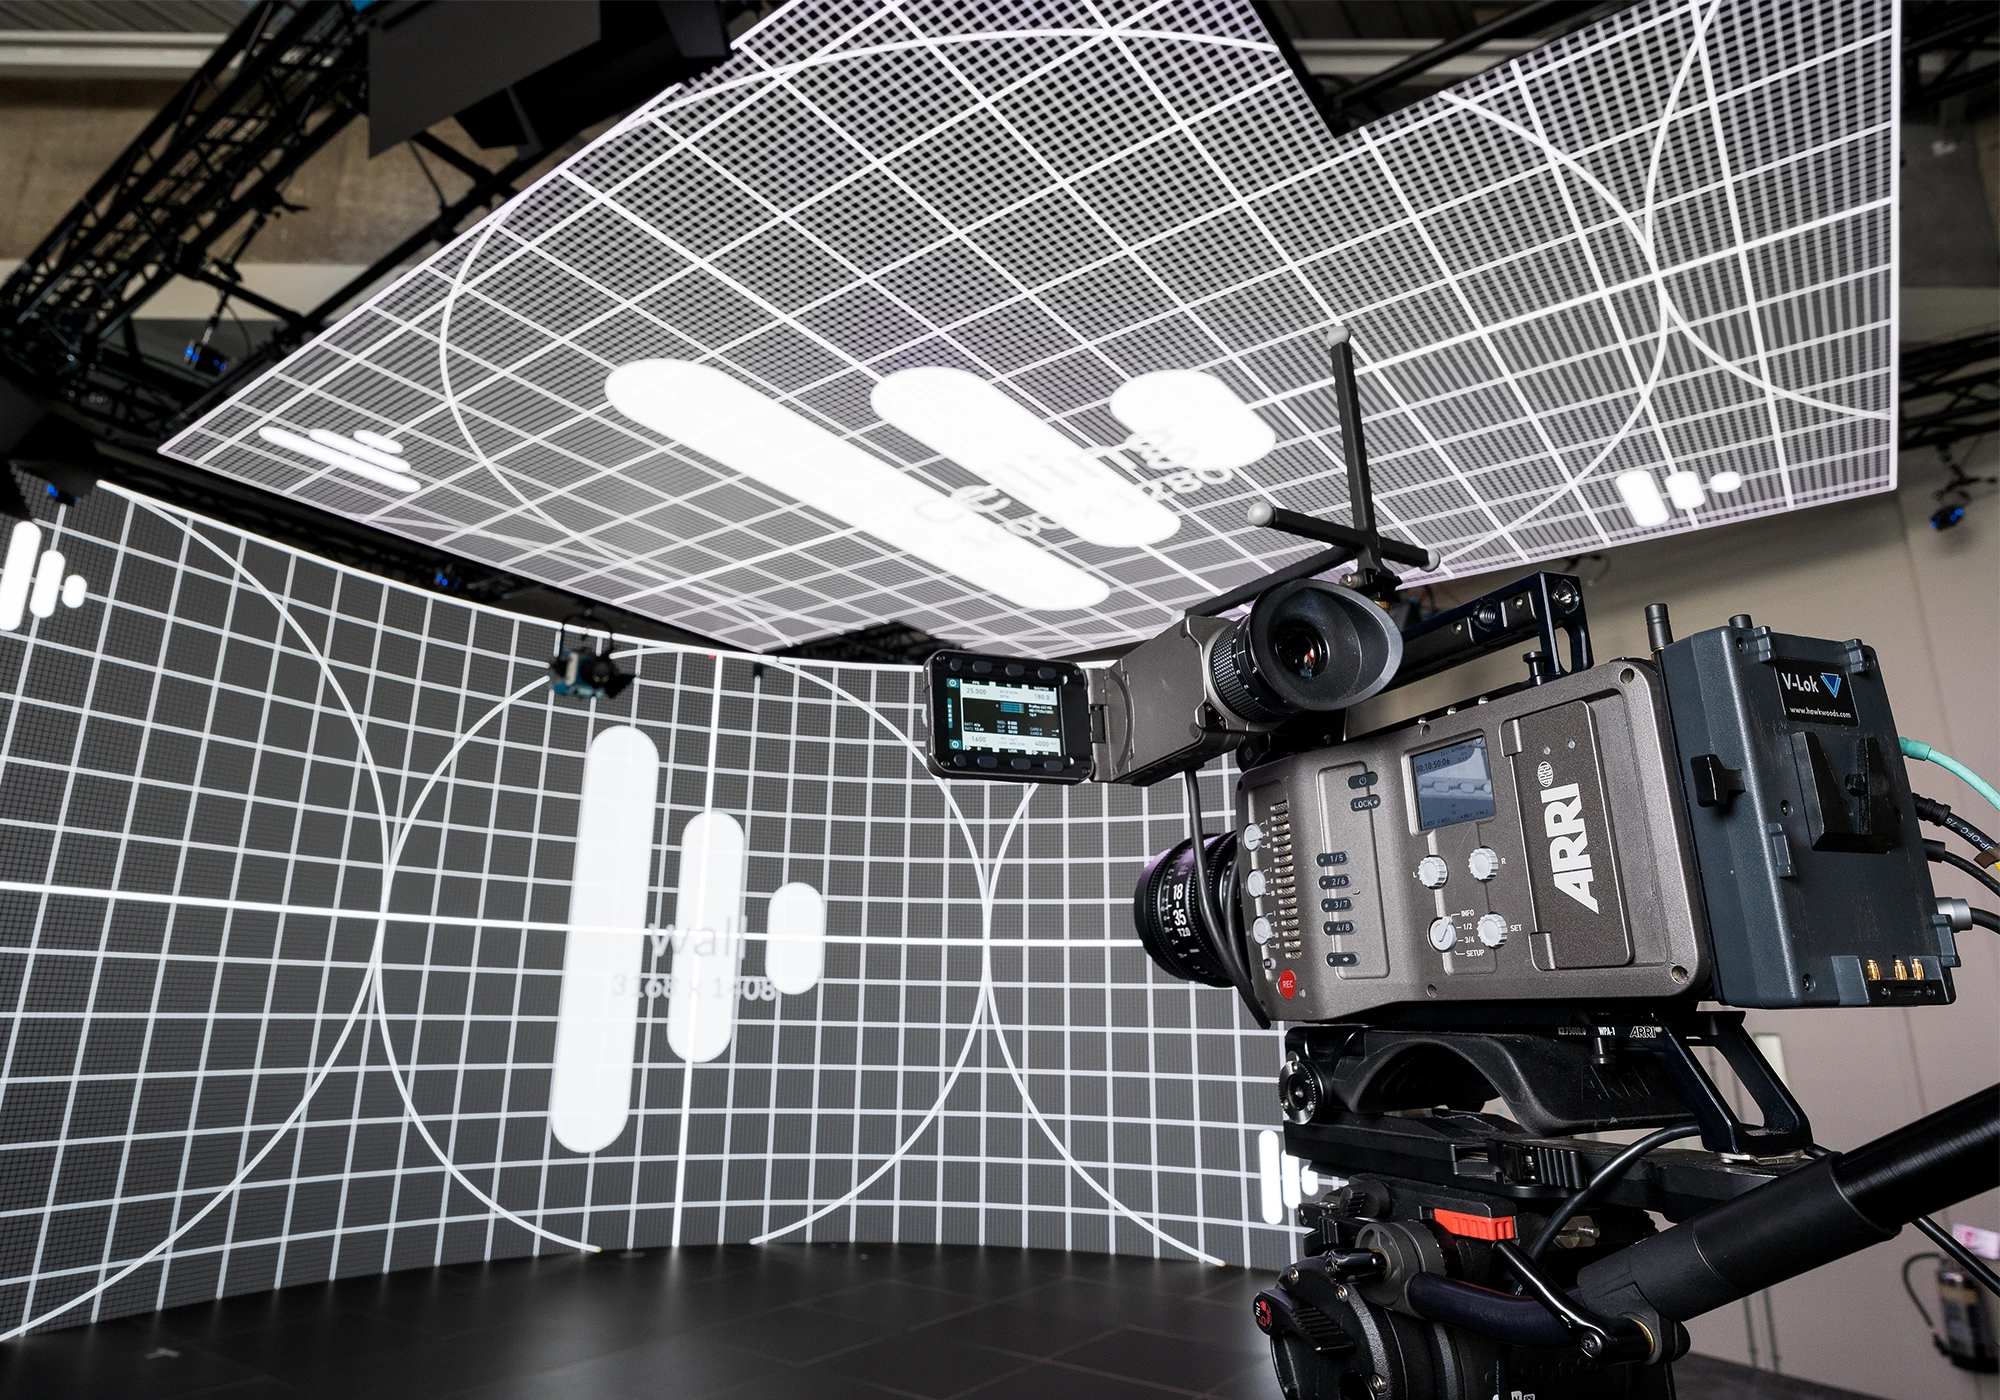
It’s important to understand however, that in most cases digital lighting isn’t enough. With the majority of the light coming from behind your subject, it can feel like they’re stood in a dark tunnel, if you don’t bring in real-world key and fill lights.
9. Book a pre-light day
A pre-light day is worth its weight in gold. Make sure you build this into your production schedule and pay for the extra studio.
Making things difficult, were the seven very different virtual environment changes, which bordered on logistical impossibility for a one day shoot. Undaunted, Saul and his gaffer pre-lit for the seven set-ups in a way that gave us the most versatility with the least amount of resetting — a complex array of fixtures where lights could be turned off and on at will according to the plan, with everything remaining in situ for the duration of the shoot. The chosen set-up included two ARRI Sky Panels and two Aladdin Bi-Flex 4 lights, with a combination of 575w, 1.2K, 1.8K and 2.5K ARRI HMIs. Between scenes, Saul quickly adjusted the colour temperature of specific lights and moved the flags and diffusion frames, to convincingly illuminate each varying environment.
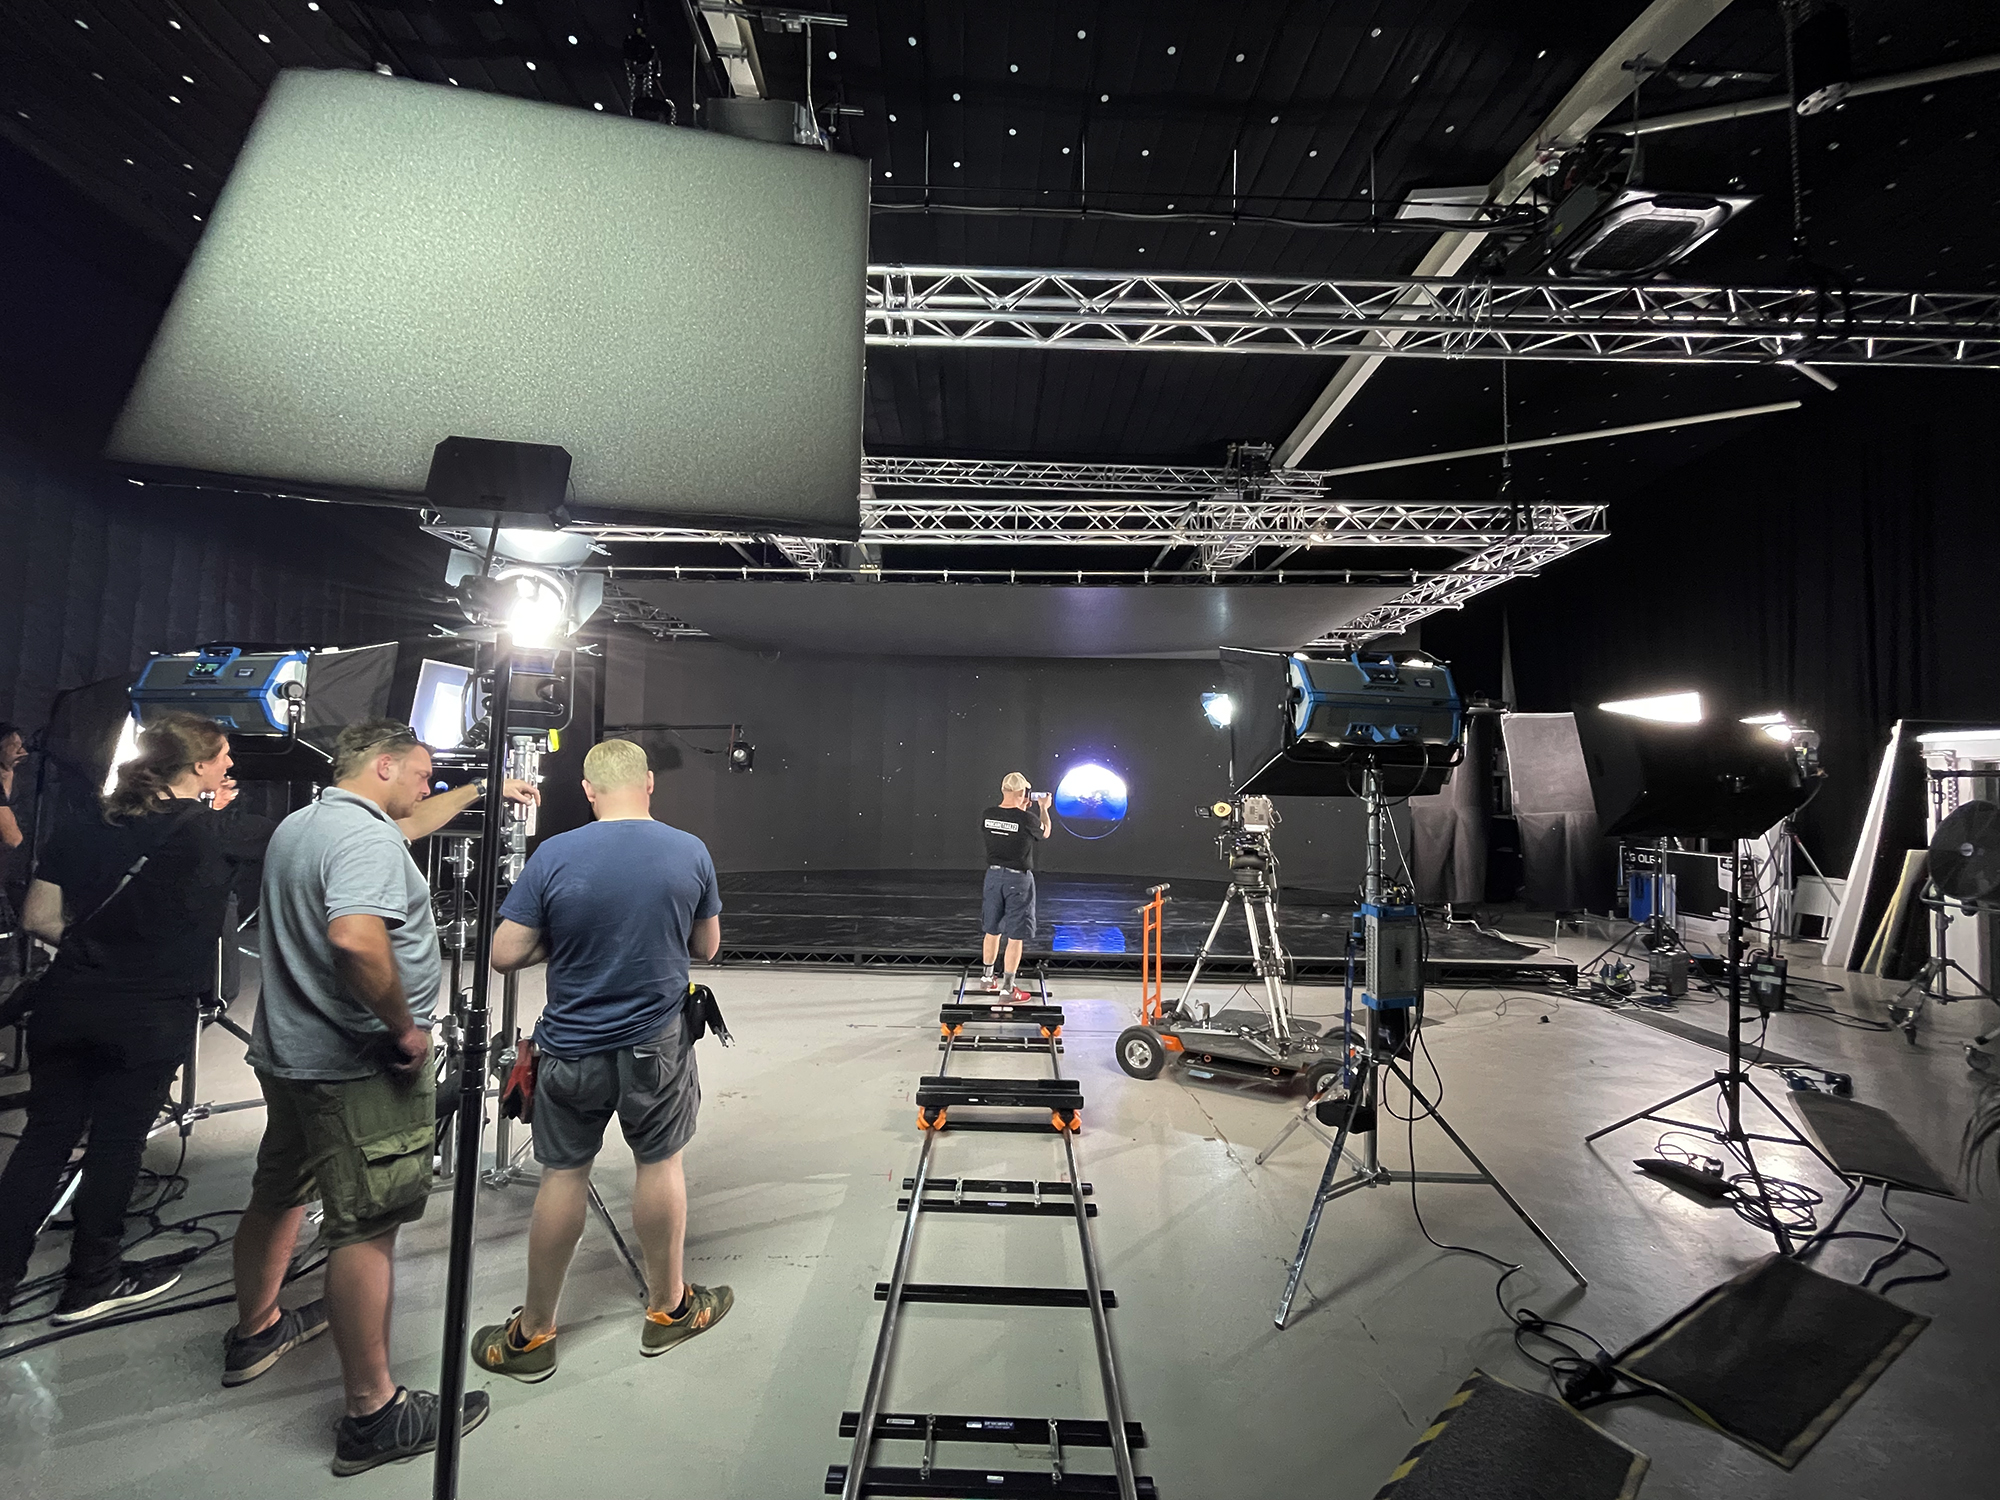
10. Sell the environment with staging and “real effects”
To really sell the illusion of a virtual production, it’s important to create a set, and to blur the lines between the real and the unreal. There are tools in Disguise that help you carefully colour match your set to the walls. All of this takes time however, which, we simply didn’t have. We stuck to what could be switched out rapidly — houseplants for forest undergrowth, a bench for City Park, supporting cast as city pedestrians.
One of the tricks to help blend real and digital, included intermittent blasts from a hazer — hilariously wafted by a spark with a 6ft poly. This injected volume to the real world lighting, mimicking digital volumetric effects, where they occurred. We used a streak filter for some scenes — the anamorphic effect being more forgiving on the eye, so that everything gelled together. In terms of clothing, we were advised to avoid darker colours, which tend to give the game away because of the higher black-point of the LED screens.
On the day it was brilliant to play God with the landscapes in real-time as you compose the shots. I caught myself saying things like, “Can you drag that wind turbine to the far ridge”, or “How will it look if we move the Earth over there?” Ultimate power!
11. Plan your filming day, limit the shots
After meticulous planning, we went into the shoot day very well prepared, but not without trepidation. The sheer number of shots and changeovers was a daunting prospect indeed, and we were right to feel this way. By the early afternoon, the schedule had slipped by an hour and a half, at which point prioritisation of the most important shots became a thing; not a situation any director wants to find themselves in — particularly with a large number of clients on-set.
This is where Tilt’s head of creative production, Ivor Sims, and our production manager, Peter Chestnut, really proved their worth with some cool-headed fire-fighting. We’d planned the entire shoot around the assumption that changeover of environments would be the greatest time-killer. In reality, because of Saul and his gaffer’s versatile lighting plan, and the expertise of Mark and his team, we found the changeovers to be quite rapid. To help bring us back on track, Ivor reworked the shot-list, based on repositioning the dolly track, which he identified as the thing that was stalling our progress the most — jumping between multiple scenes for each position of the track.
With a fair wind in the sails as the afternoon progressed, we wrapped with every shot in the can a whole five minutes ahead of schedule.
12. Find your frustum
This is a word that you hear a lot with VP. The Virtual Production Glossary describes frustum as “… The region of a virtual world, which appears as a viewport to the camera. On an LED volume, the inner frustum moves in sync with the camera, while the outer frustum is unseen …”. What this means is that as the camera moves, you see a window on the LED wall, slightly wider than what the camera lens is seeing. Everything within that window as it sweeps around the screen, tracked to the camera movements, is rendered in fine detail; Everything outside of that area is only needed for ambient lighting and reflections, so for optimisation purposes, appears at a much lower resolution.
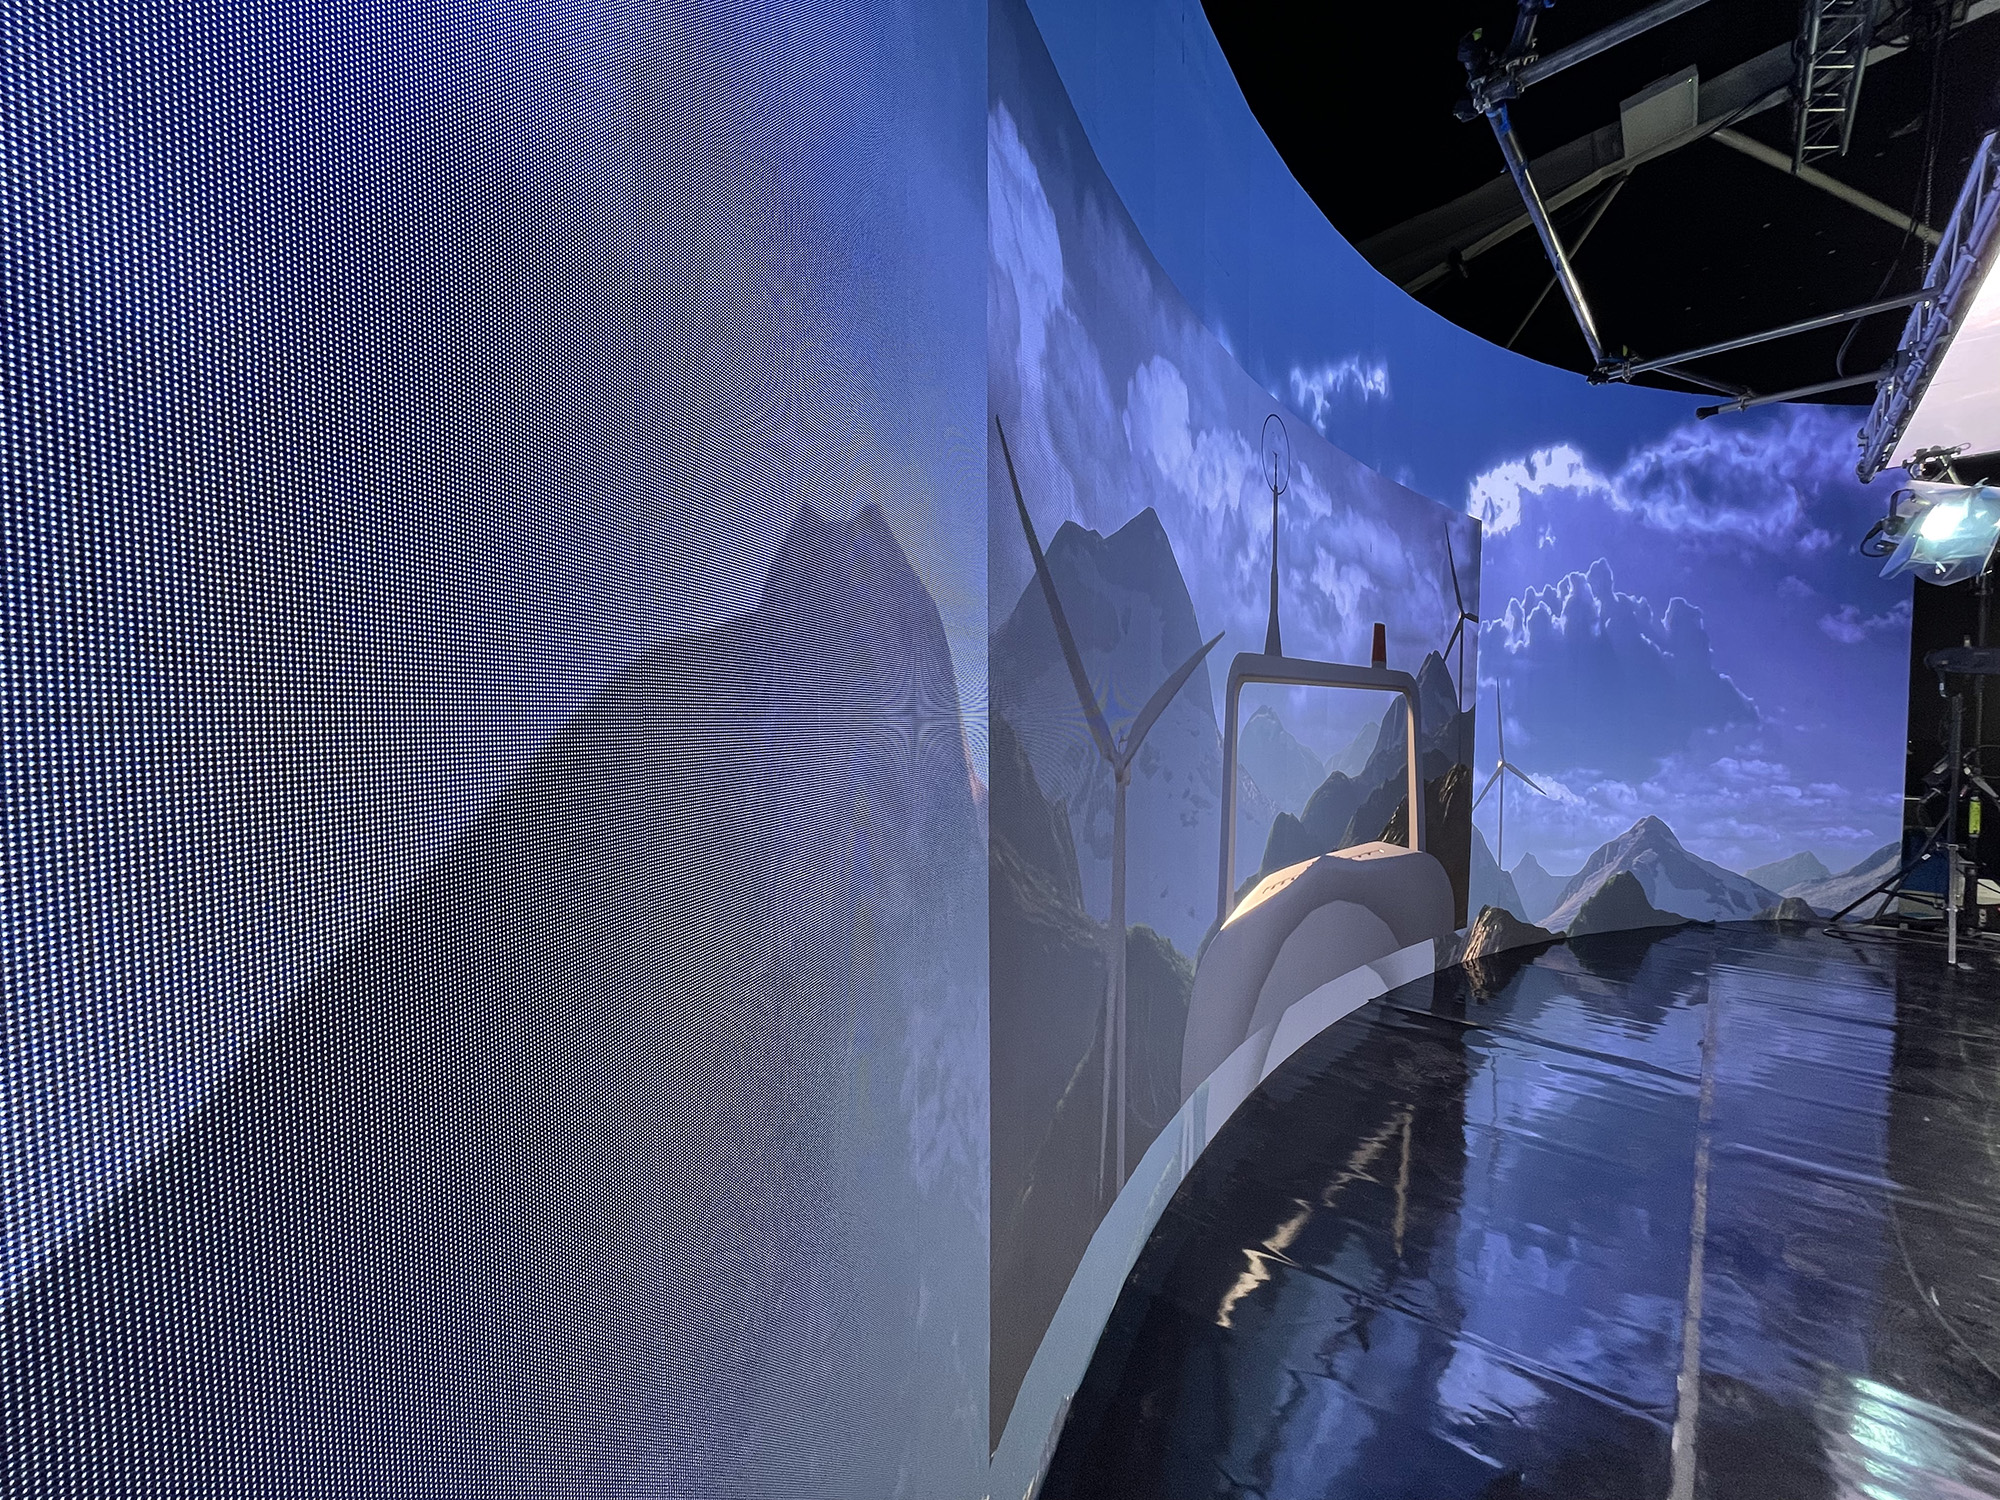
Something that was very useful here, was the ability to render the inner frustum as green screen at the press of a button in Disguise. For certain difficult to choreograph animations, we’d taken the decision to do them in post, and using this method saved us a lot of roto time down the line. It’s the best of both worlds, where lighting and reflections are correct in-camera from the outer frustum, but you still have all the benefits that green screen can offer locked to the inner frustum.
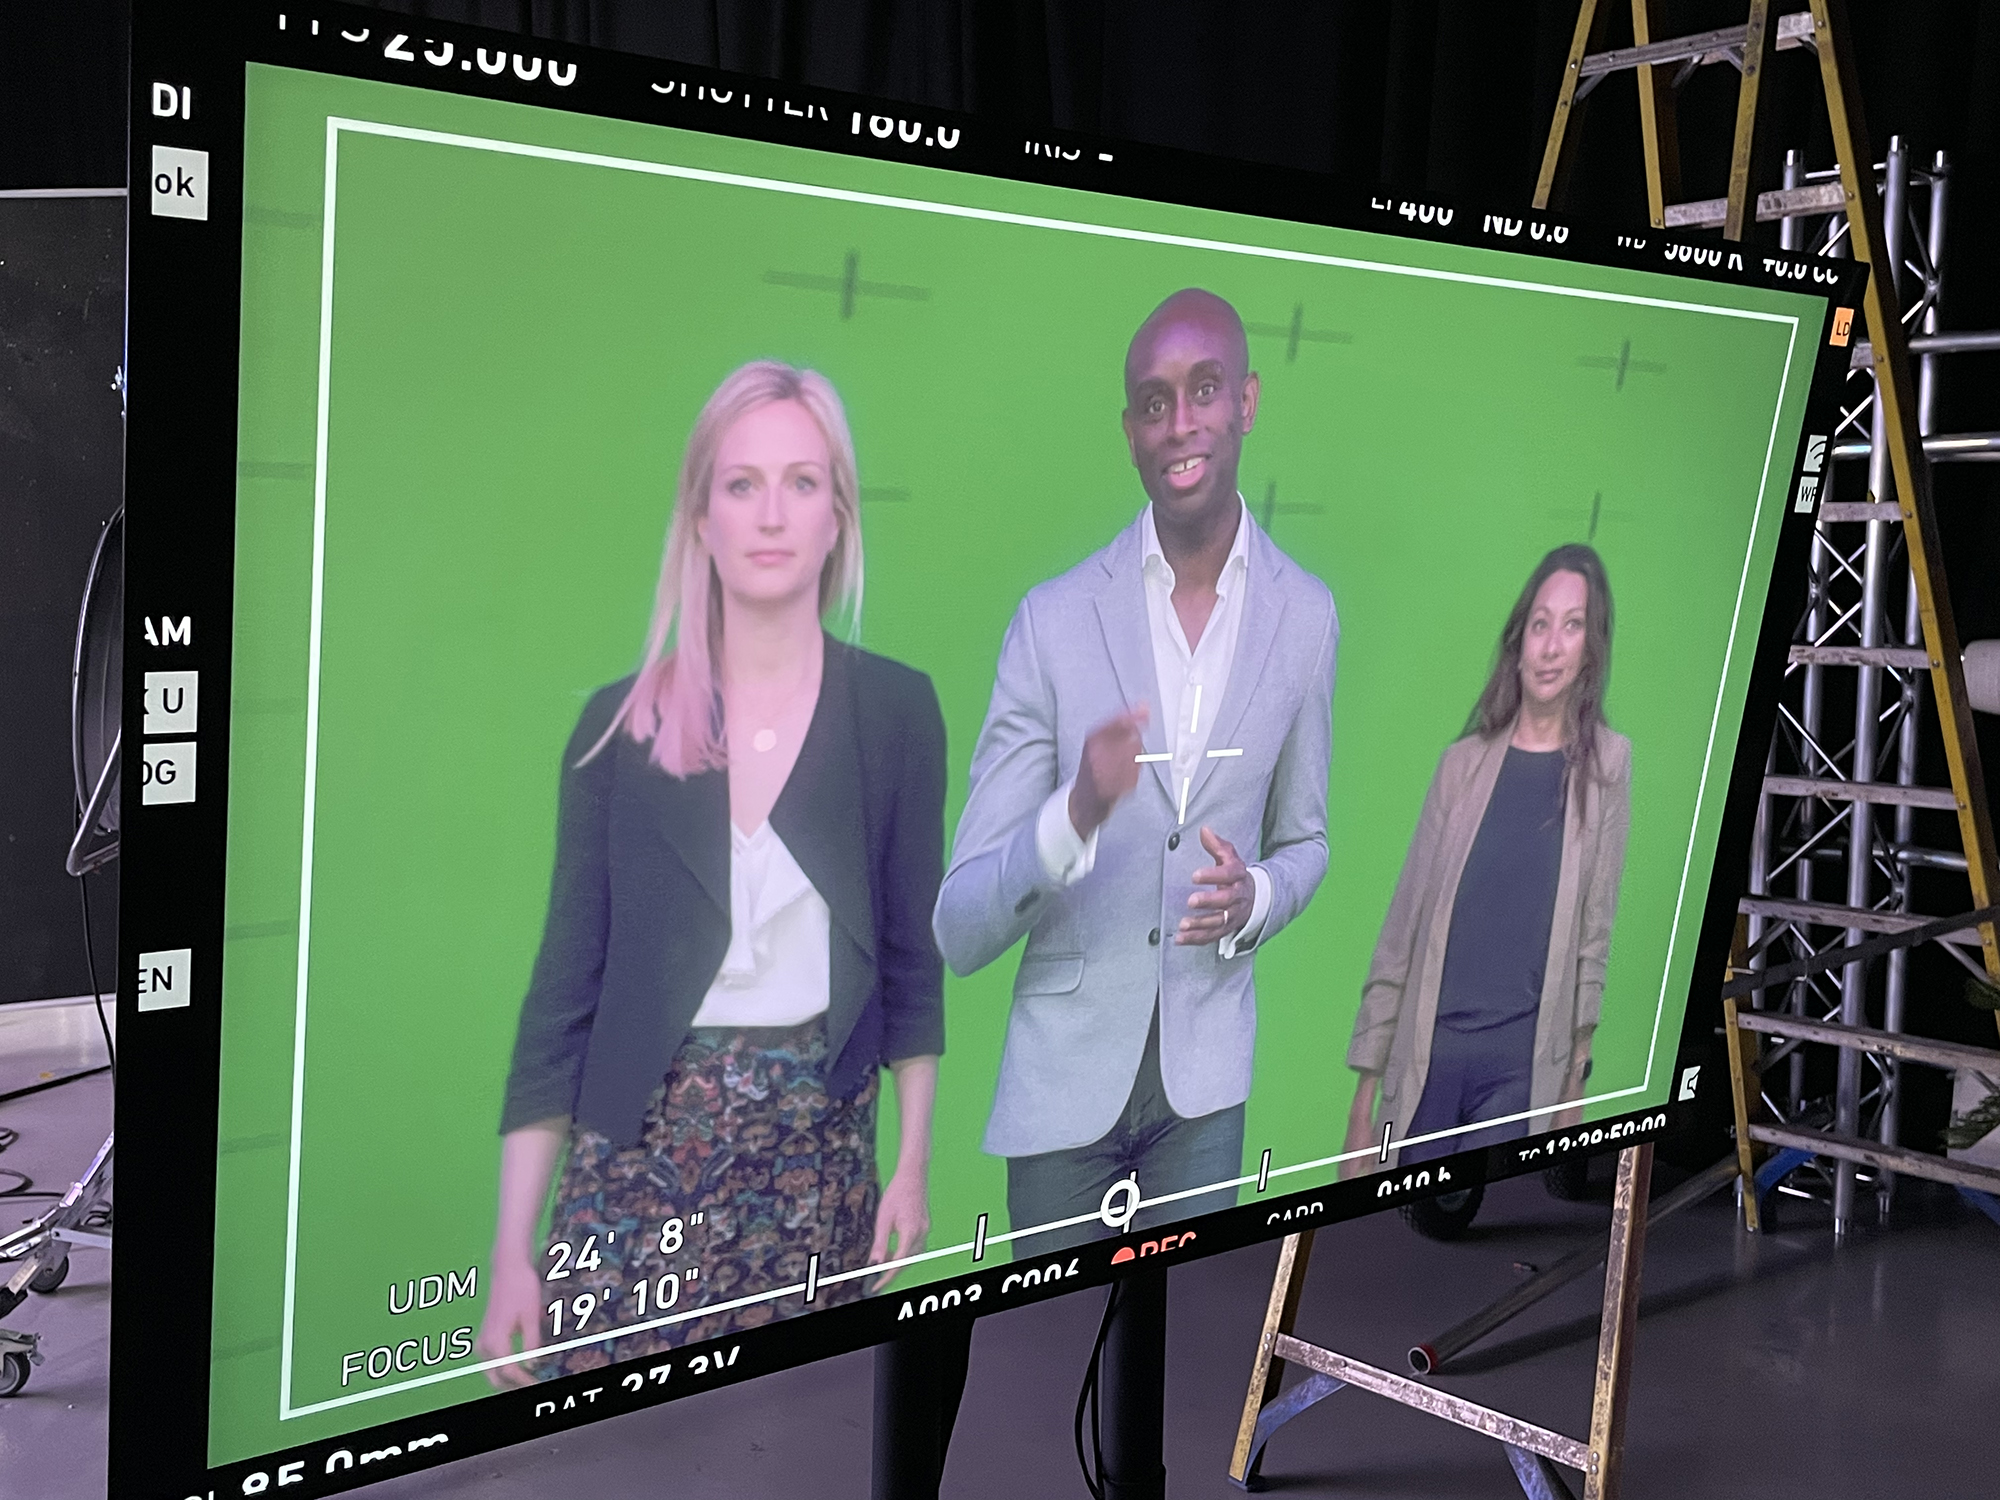
13. Plan the post-production (you’ll need more than you think)
Keeping things simple in terms of animation on the shoot day, inevitably added more effort in post. It’s also worth pointing out that you can’t have a fully sharp focus on the backdrop with VP, because of moiré. This is quite a drawback, and certain shots could only be comped in afterwards.
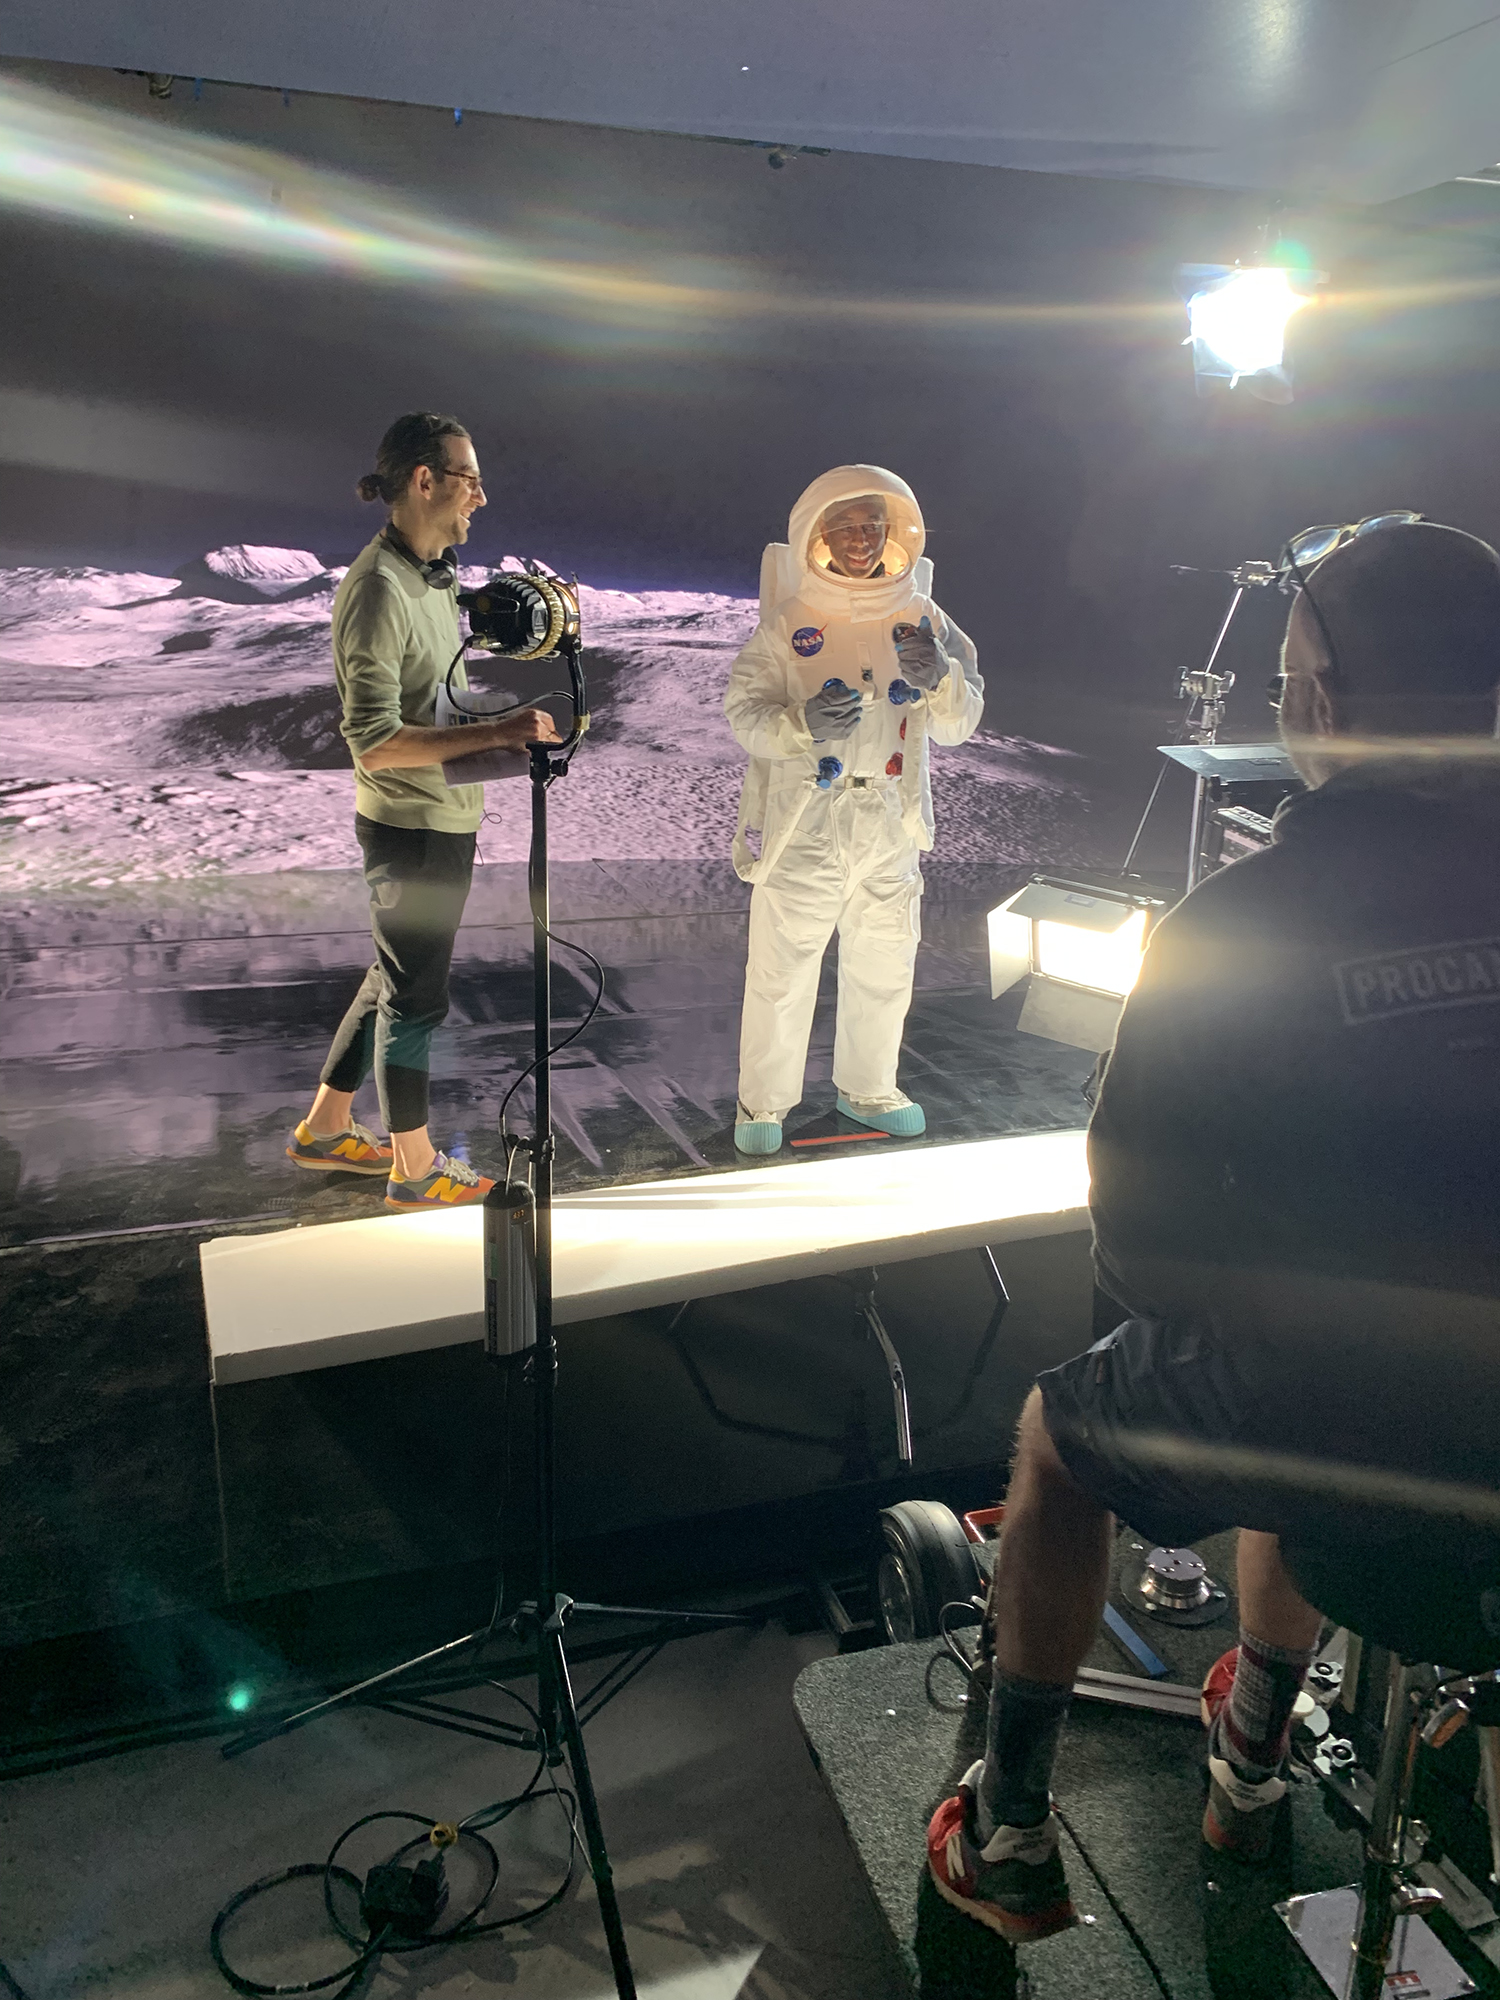
In reality, most of the scenes needed additional CGI of some kind or another — adding giant blades to the turbine, sweeping in front of the talent, some laborious roto in a couple of shots that were too wide for green screen frustum, a glowing CGI marble representing our fragile planet, tracked between the talent’s thumb and forefinger, and laying in JJ Abrams’ style optical flares for the space scenes.
Having gone into the shoot with such a well-developed animatic, the edit was relatively simple. It was the blood, sweat and tears from our brilliant in-house motion team, with the help of epic sound designer, John Valledy, colourist, Matt Jones, and music by film composer, Finn McNicholas, that really brought everything together beautifully. The end result is a film that we can all be very proud of, with our carbon footprint calculated by Albert and our emissions offset.
14. Do your research
When going into something that is new to you, I can’t stress enough that lots of early research is the key. Don’t quote for the work until you understand the entire process in good detail. With virtual production, the numbers can escalate rapidly, so speak to experts, and really take their advice on board, even if this means changing your vision. There were many hurdles that we hadn’t quite anticipated, and taking this collaborative approach was something that ultimately kept us on time and on budget.
Sometimes, of course, you have to hold onto the things that really matter. For this film, it was vitally important to transport our talent to a wide variety of environments, and I’m glad that I dug my heels in with this. It was about understanding from Saul and Mark why this would be challenging, and getting around the table with them to figure out how we could feasibly achieve it, in a way that they were both happy with as respected expert professionals.
Another cause of some anxiety was having a Partner in the firm as your talent. An actor is quite used to exhausting 12-hour shoot days, but putting a senior client through that is something quite different. The shoot day commenced with him being boiled alive in a rented space suit for two hours, and we were lucky that he had a very good sense of humour — remaining open and enthusiastic to the very last shot.
All-in-all, this exciting project was an overwhelming success, that could only happen through a process of extensive collaboration. As time goes on, I can see this technology really taking over across the board, and with recent innovations, such as the Vive Mars CamTrack, it becomes increasingly possible for indie filmmakers to step into this magical world.


SHARE: